

Allow “Roam.ai” to use your location?
Gaining your users’ permission for accessing their location data can be vital. It gives you the opportunity to deliver personalized content that drives user engagement and conversion. And it could even make the difference between a functioning app and one without any value. But as privacy concerns are growing, so is the reluctance to share personal location data.
Most users nowadays choose to share their location only while using the app. This can create issues for companies that still need location information even when the app is closed.
We designed this guide to help you optimize your location permissions, user flow and build clear, value-based user consent so you can build user trust and increase opt-in rates.
In this article we’ll cover:
- The best practices for increasing opt-in rates for location permissions
- Examples from different types of apps
How to increase the opt-in rate for location permissions in 6 easy steps
1. Transparency
Users are becoming increasingly distrustful of how their private location data is being used. You must be completely transparent and open about why you are requesting location permissions so your user can make an informed decision about opting in.
Use clear and concise language in your location prompts to explain how you will collect and use the location data with full compliance with privacy regulations. Avoid jargon and get to the point. Remember, only request location permissions when it is essential for a feature to function properly.
From December 8th, iOS14 also requires you to create privacy “nutrition labels” that appear in the app store before your user decides to download the app. Just like the labels on your groceries, these will inform users’ what’s inside your app, and that includes location. Whether you require precise or approximate location tracking, it’s important to keep your labels up to date.
2. Demonstrate the end-user value
To increase the opt-in rate it’s essential to clearly communicate the end-user value of sharing personal location data with your business. Despite users’ reluctance to share personal information, research shows that over half of consumers are happy to provide their location data in exchange for clear benefits.
So if your app requires location services for a ride-sharing app, explain that without accepting location permissions they won’t be able to track where their driver is, or use the app at all. If you’re a fitness app developer, highlight that location is essential if your users want to track their route. With an increasing number of apps requesting location permissions, always tell the user what they get in exchange for allowing yours.
Note: iOS 14 and Android 11 only allow developers to first request foreground location permissions before requesting background location permissions. If you require Allow While in Use, it is even more important to show your user why it’s needed.
3. Timing
You only get one first impression! If your user is presented with a location prompt immediately when the app opens, the initial response may be to quickly press deny. This is especially the case for apps with secondary location functionality, such as retail or a travel agency. To increase the opt-in rate, allow your user to familiarise themselves with the app, and only ask for location permissions when they are using a relevant feature.
If location is critical for functionality consider adding a pre-permission screen before the official dialogue box to give more detailed information.
4. Pre-permission location screen
Custom dialogue boxes give you limited space to communicate the benefits of sharing location data. Giving your user more context and information before presenting them with a location request can build trust and significantly improve opt-in rates.
A pre-permission is an overlay containing completely customizable visuals and an expanded explanation of how granting location access will benefit your users and how you’ll protect their privacy. There’s no need to squeeze all the information into one sentence. Make use of the screen space with custom text and visuals. Only once the user accepts your pre-permission, will the official dialogue box be presented. If your user declines your primer, you can decide to show permissions again at another time.
5. Make it easy for users to change their settings
As much as you optimize your permission dialogue and user flow, it’s inevitable that some users will make the decision to not share their data. But all is not lost! You can prompt your users to manually accept permissions by clearly communicating the benefits they will miss our on by not granting access.
Will they not receive location-based offers? Is location required for users to find what they are looking for? And if access to location is critical for app functionality, provide a clear warning and a shortcut to settings so users can easily re-enable permissions and start using your app.
6. Optimize and test
Words matter! If you aren’t getting the results you want, customize your pre-permission screen and prompt box. With the right timing, content and user flow, you can build trust and deliver the best location-based experience possible.
Best examples of location permission user flow
Booking.com - Secondary feature location permissions
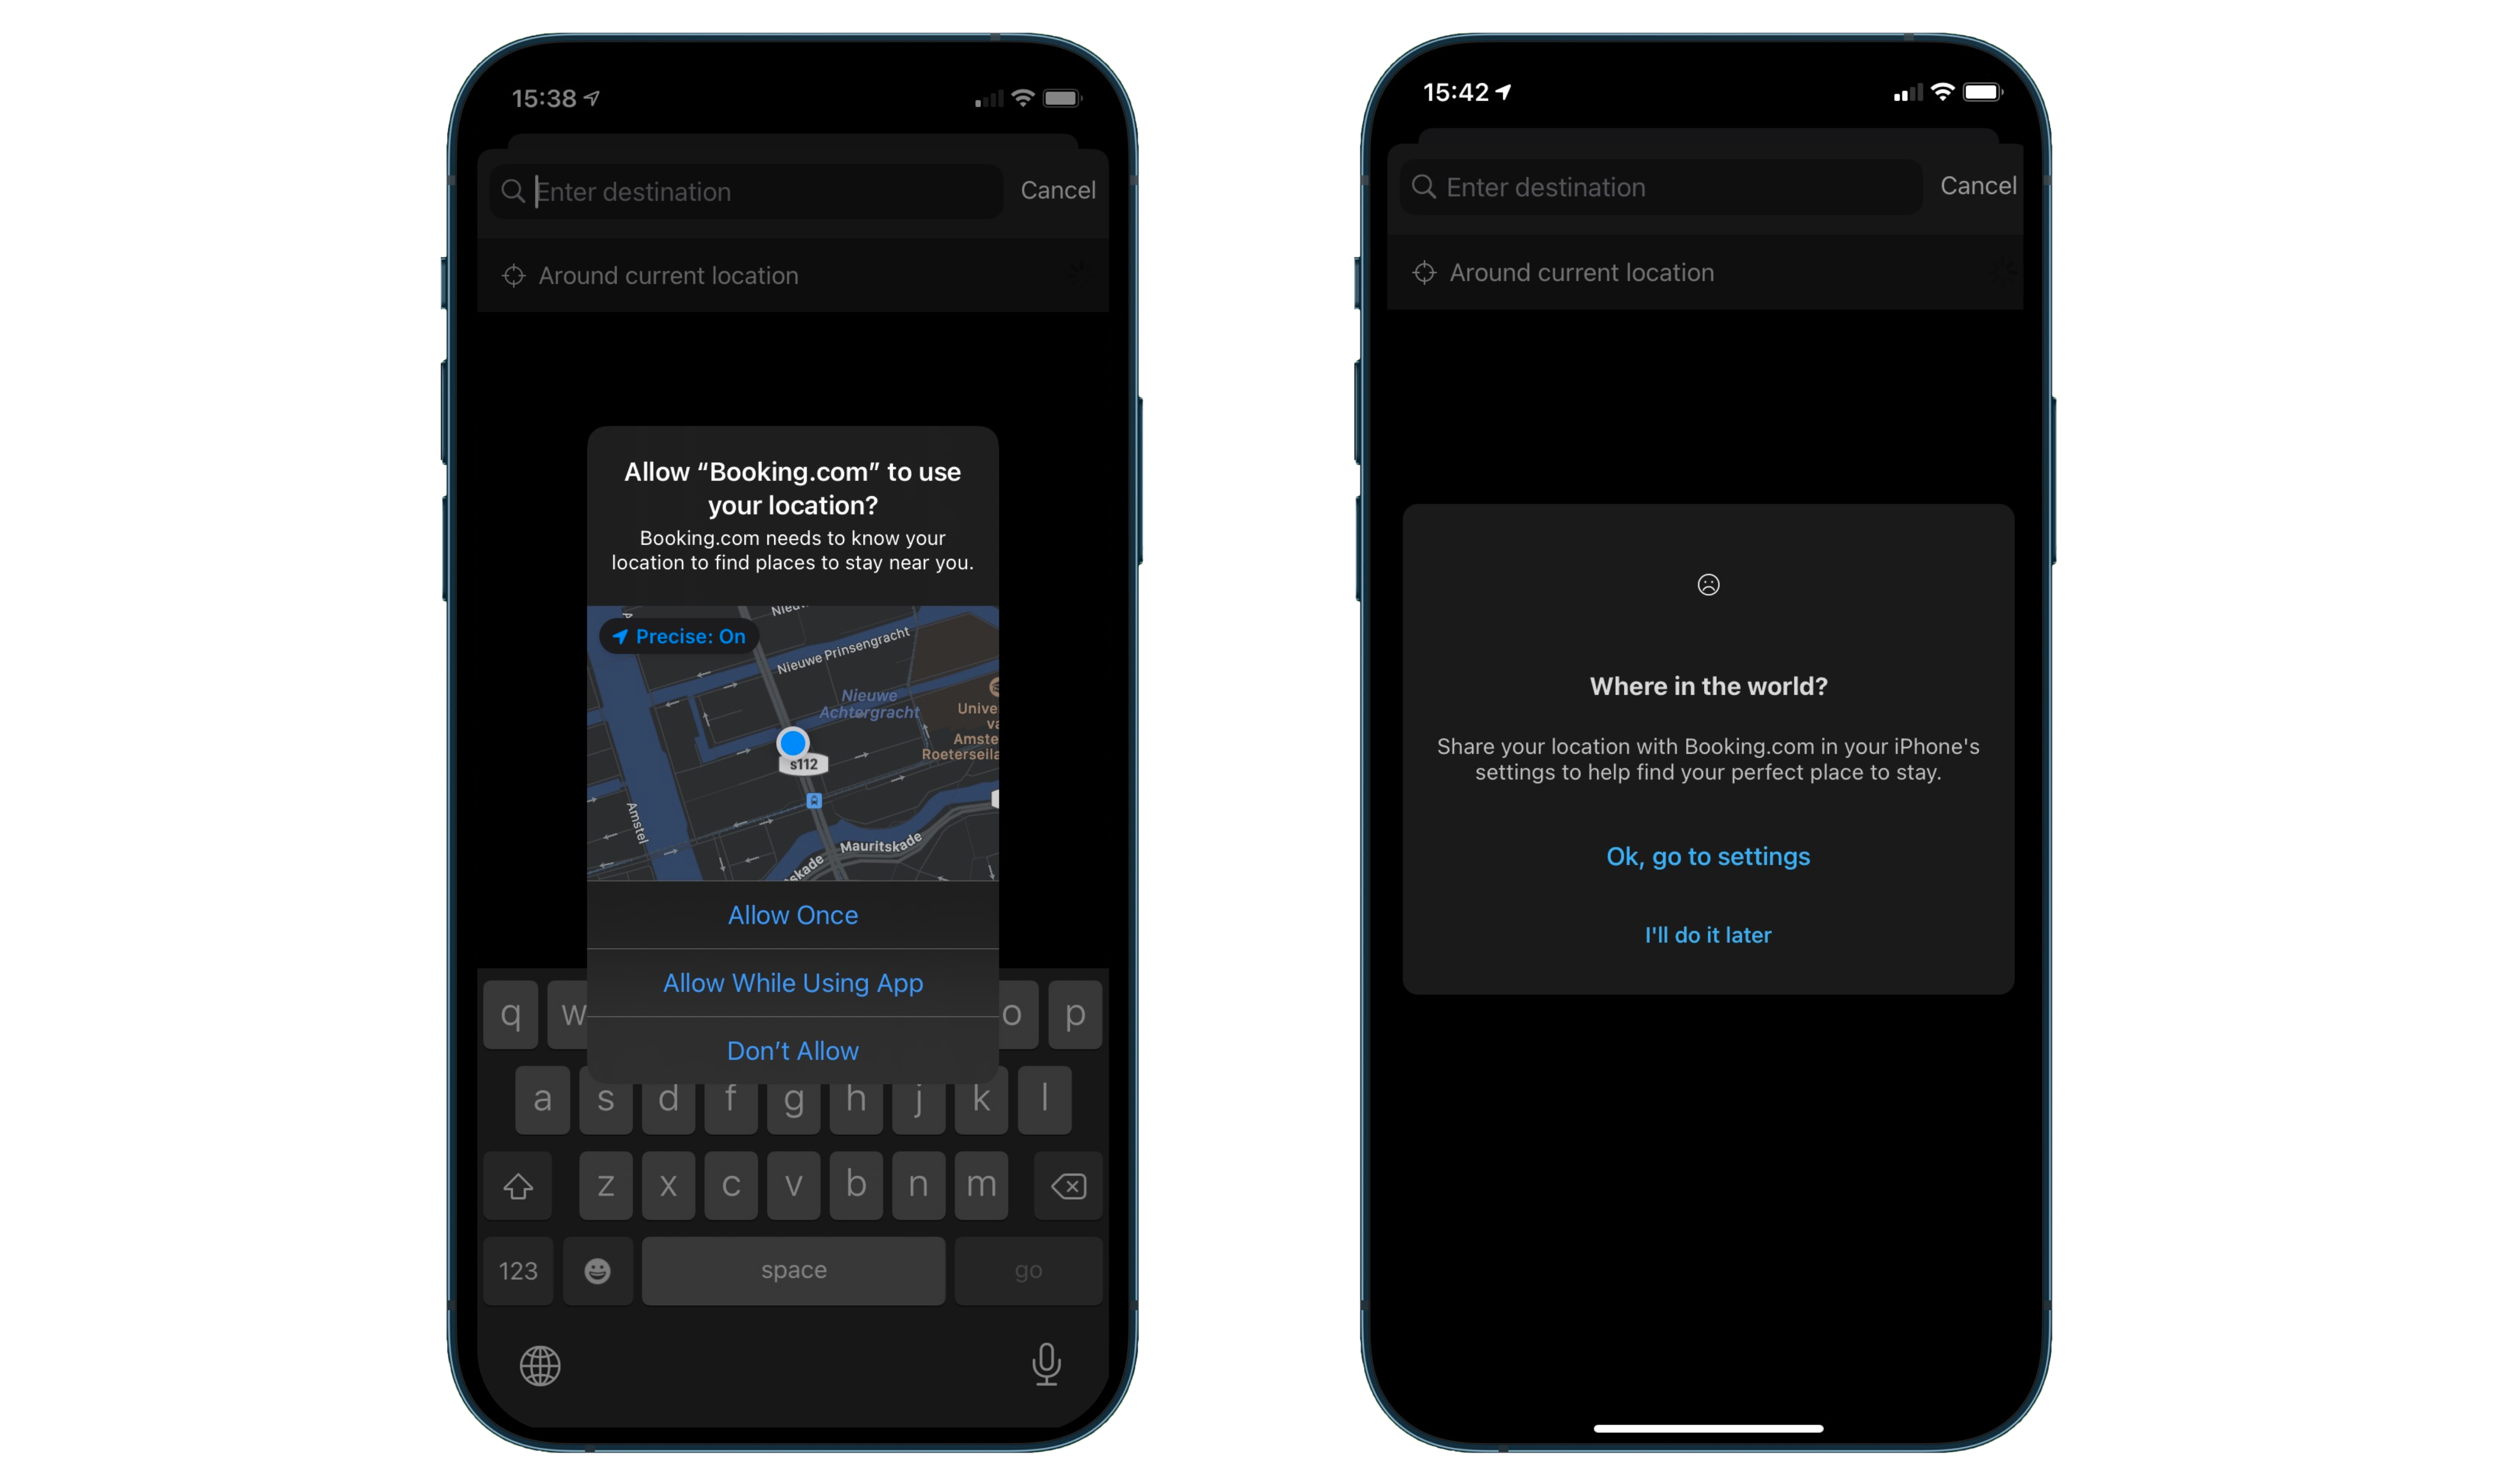
✅ Timing: The prompt is not presented immediately when the app opens. This gives the user time to get acquainted with the app, increasing trust and opt-in rate.
✅Relevancy: Permissions are only shown when using a relevant feature requiring location.
✅Short and sweet: The end-user value is stated simply and clearly. In trade for your location, you’ll get to see the best hotel offers in your area.
✅Settings shortcut: If the user denies permissions, a prompt is displayed that takes the user straight to their settings. Easy!
Strava: Critical location permissions
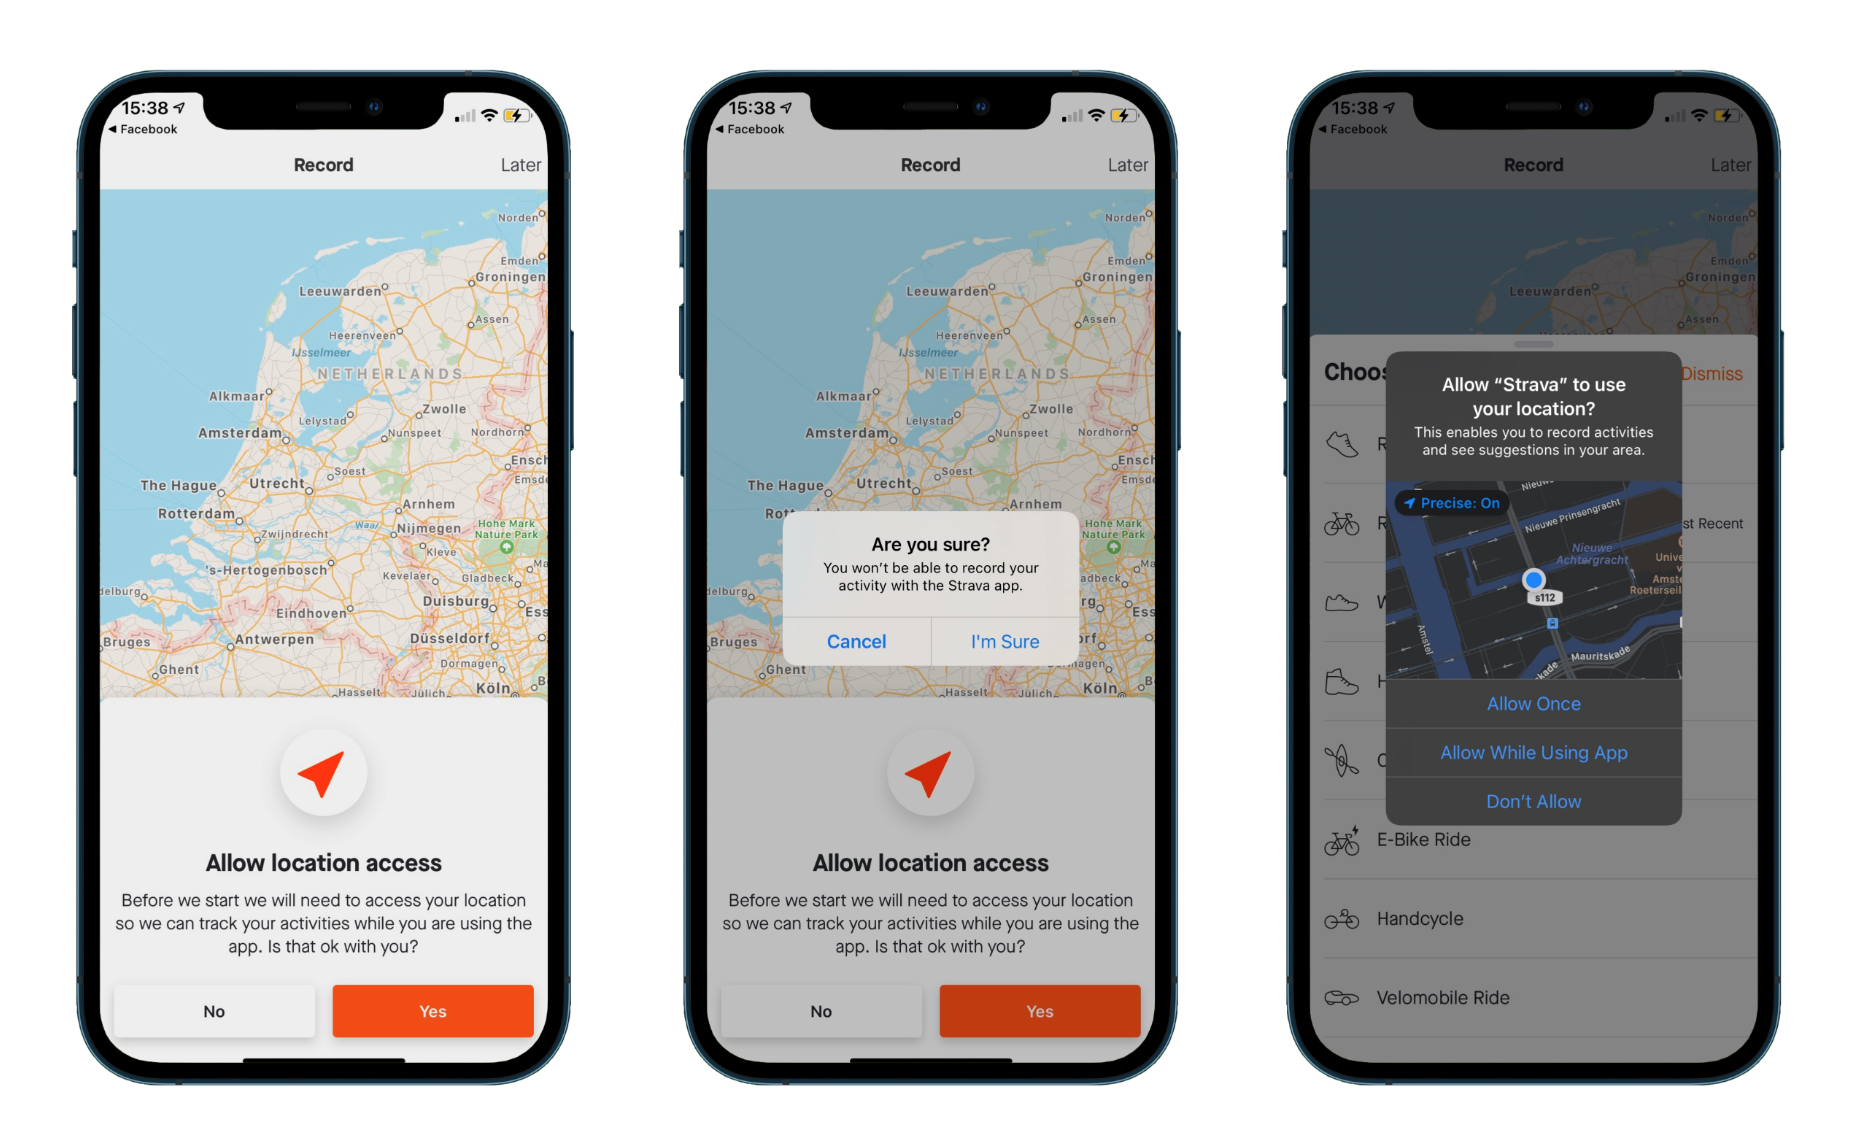
✅Pre-permission: This “soft ask” does a good job at highlighting the value with human language in a clear and concise manner.
✅Transparency: The text gives the user all the information to make an informed decision. The wording makes it clear that it is necessary to select “Allow While Using App”.
✅Warning prompt: If you don't allow access, Strava gives you another chance. This time, highlighting that it is essential for app functionality.
✅ Value first: Strava tells you exactly what you’re missing out on if you deny permissions, putting the main benefit first.
As privacy concerns continue to grow, it is becoming increasingly difficult for developers to get the opt-in needed for location features. But with the right timing, content and user flow, you can increase your chance of success! Remember, don’t bombard your users with unnecessary prompts and always put value first.
Need help implementing location into your app?
Contact Roam today and we’ll be happy to help you get started.