In short: Roam.ai's Android location tracking software development kit lets you build location-aware apps for Android users with premium accuracy and minimum battery drain. This article gives you a introductory breakdown on the setting up, installation, and initialization process of our location SDK so you have a better understanding of what is explained in our docs pages.
In this article, we’ll be giving you a quick rundown on how to integrate location tracking using our Android location SDK. Before we get started, let’s establish why you should integrate our location tracking SDK.
Why you should integrate Roam’s Android SDK
Location features are common among a great number of mobile apps. From ride-hailing to social media to fitness– there is an abundance of applications that rely on location-tracking technology to deliver the best customer experience. Given that the application marketplace is a highly competitive arena, retaining users is dependent on the quality of your app and the service it provides.
Delivering location-reliant information can be demanding on mobile devices, resulting in inaccurate data and high battery drain. This is common due to the demand for the mobile device’s GPS receiver to deliver location information at a higher rate than what is necessary, and sometimes, because it’s the only IoT device used.
Our Android location tracking development kit lets you build location-aware apps with premium location accuracy while achieving minimal battery drain for Android phones. It’s a powerful and customizable SDK that lets you integrate tracking modes and features that best fit your business needs.
Tracking location with Roam’s location SDK for Android
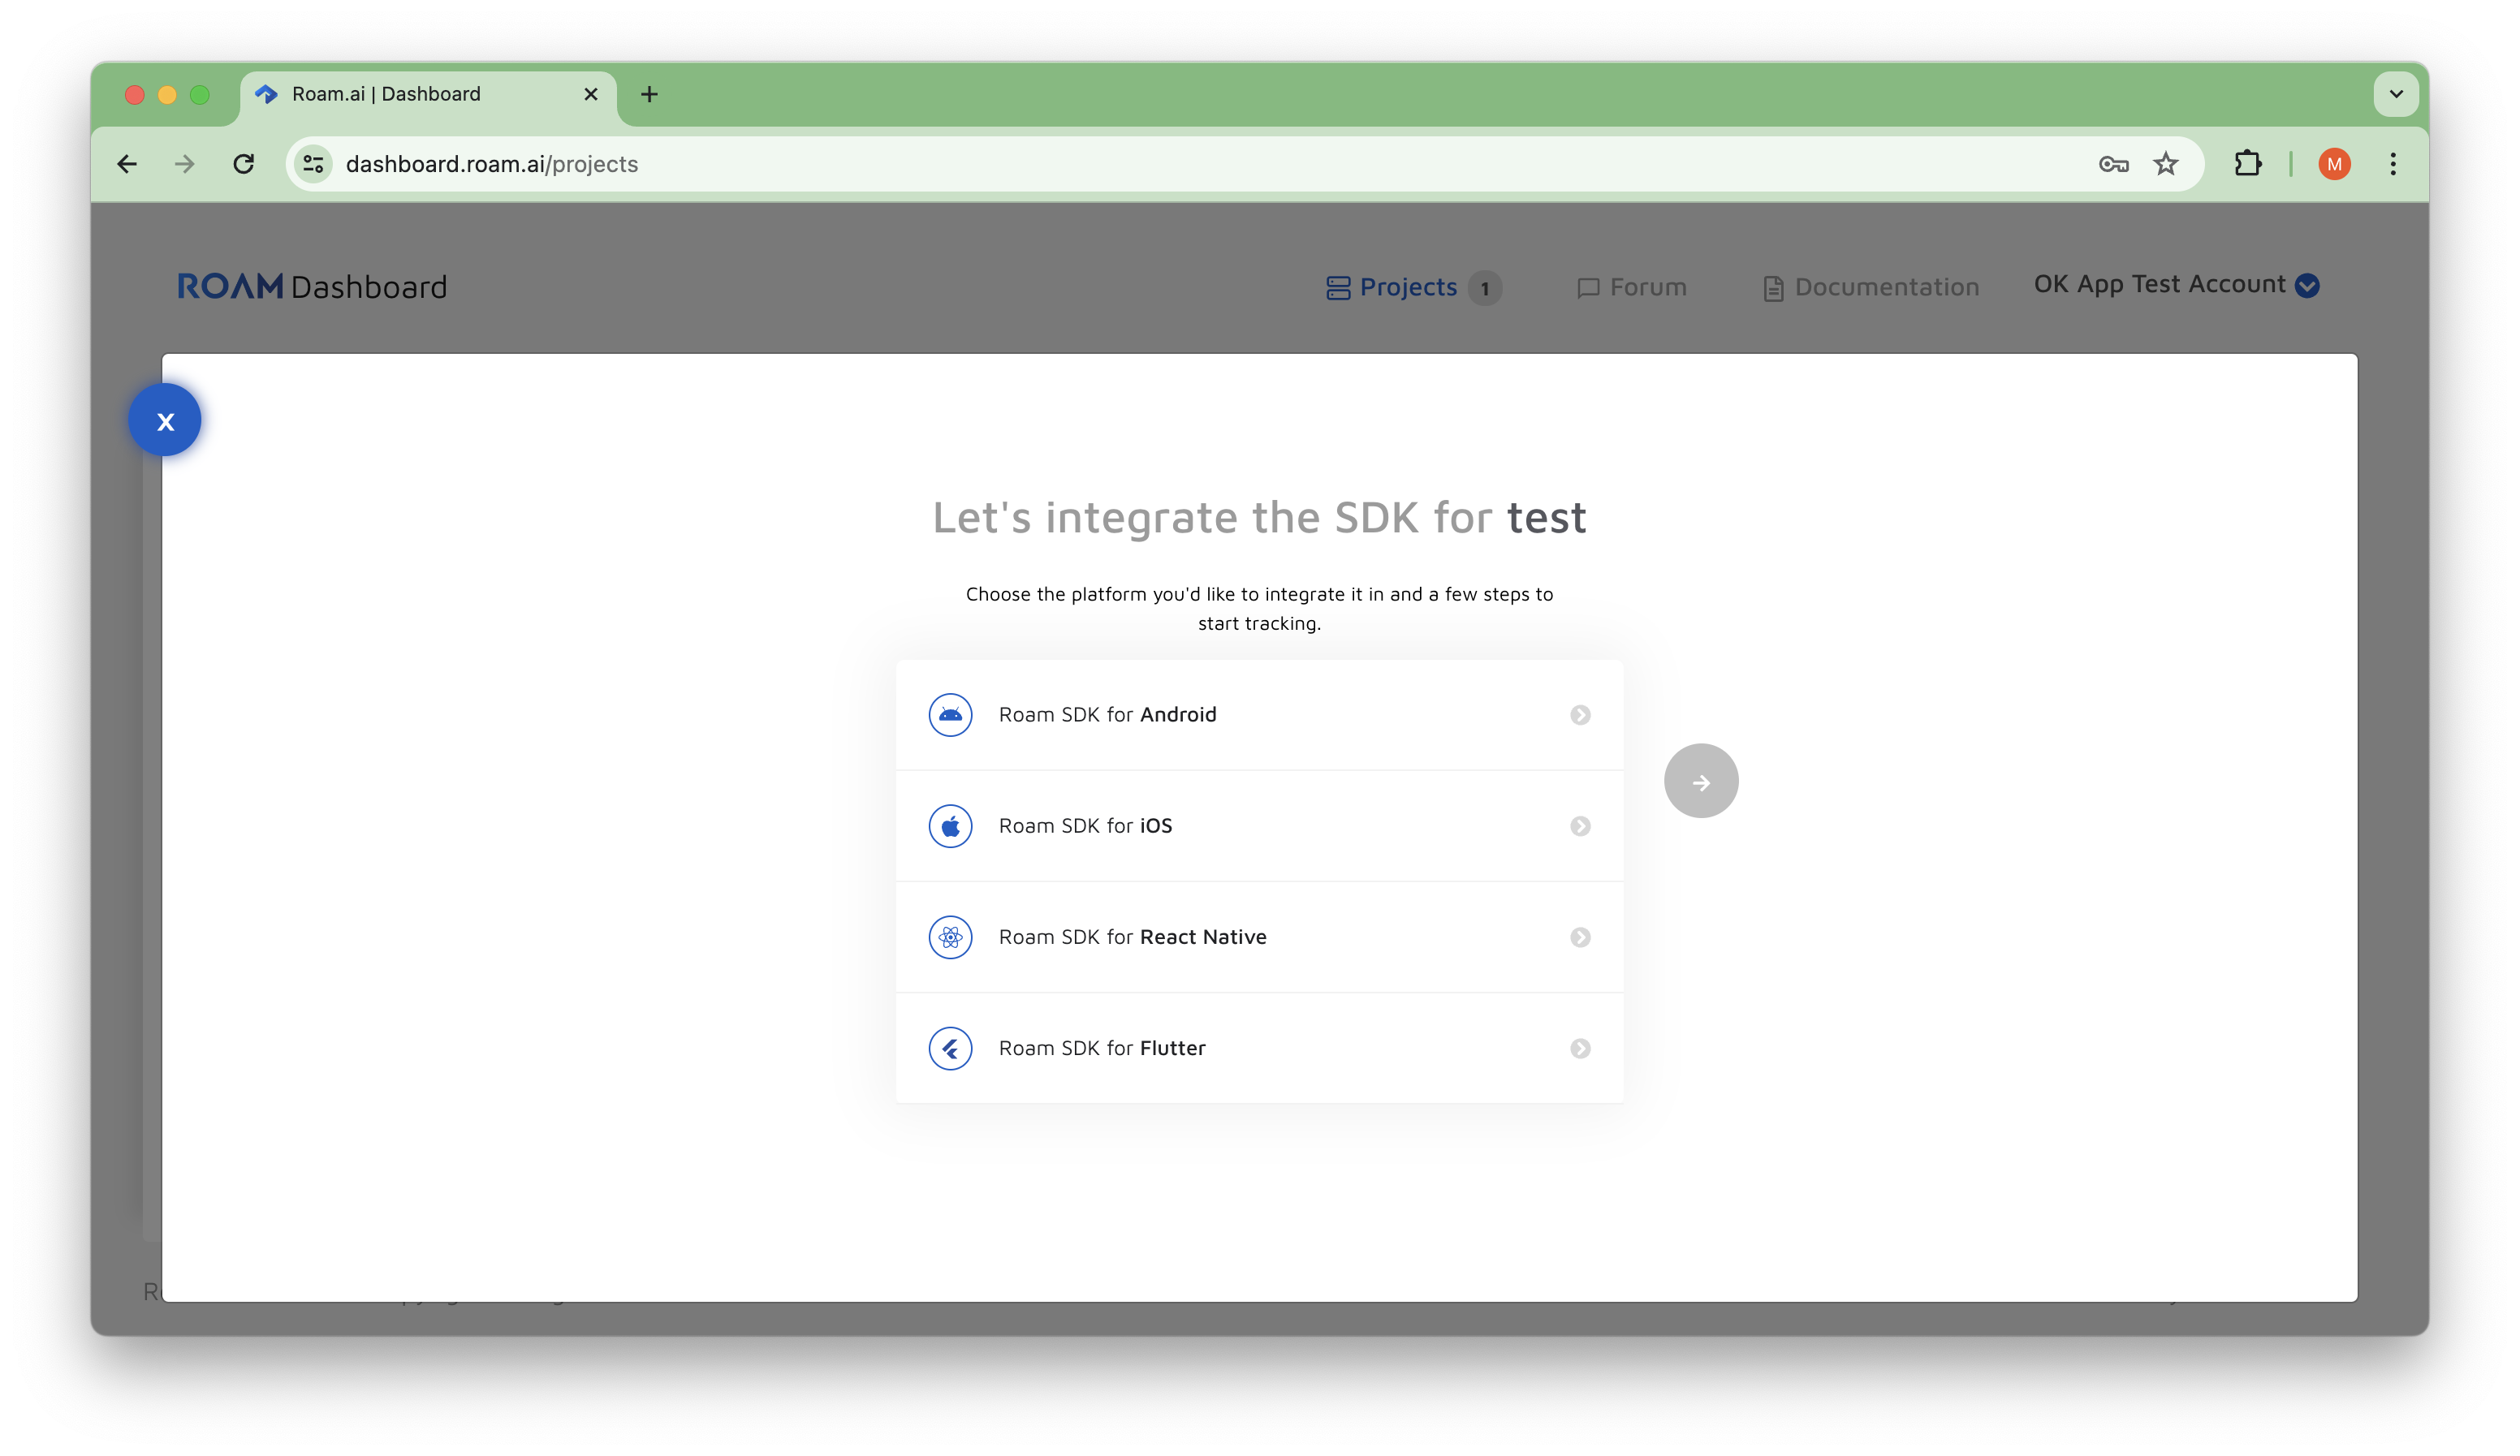
To integrate location tracking you’ll need to create a Roam account. This can be done for free without a credit card. Once you’ve got that set up, you’ll need to create a project on our dashboard.
1. Name the project in whatever way you wish and select “Roam SDK for Android” as your project type.

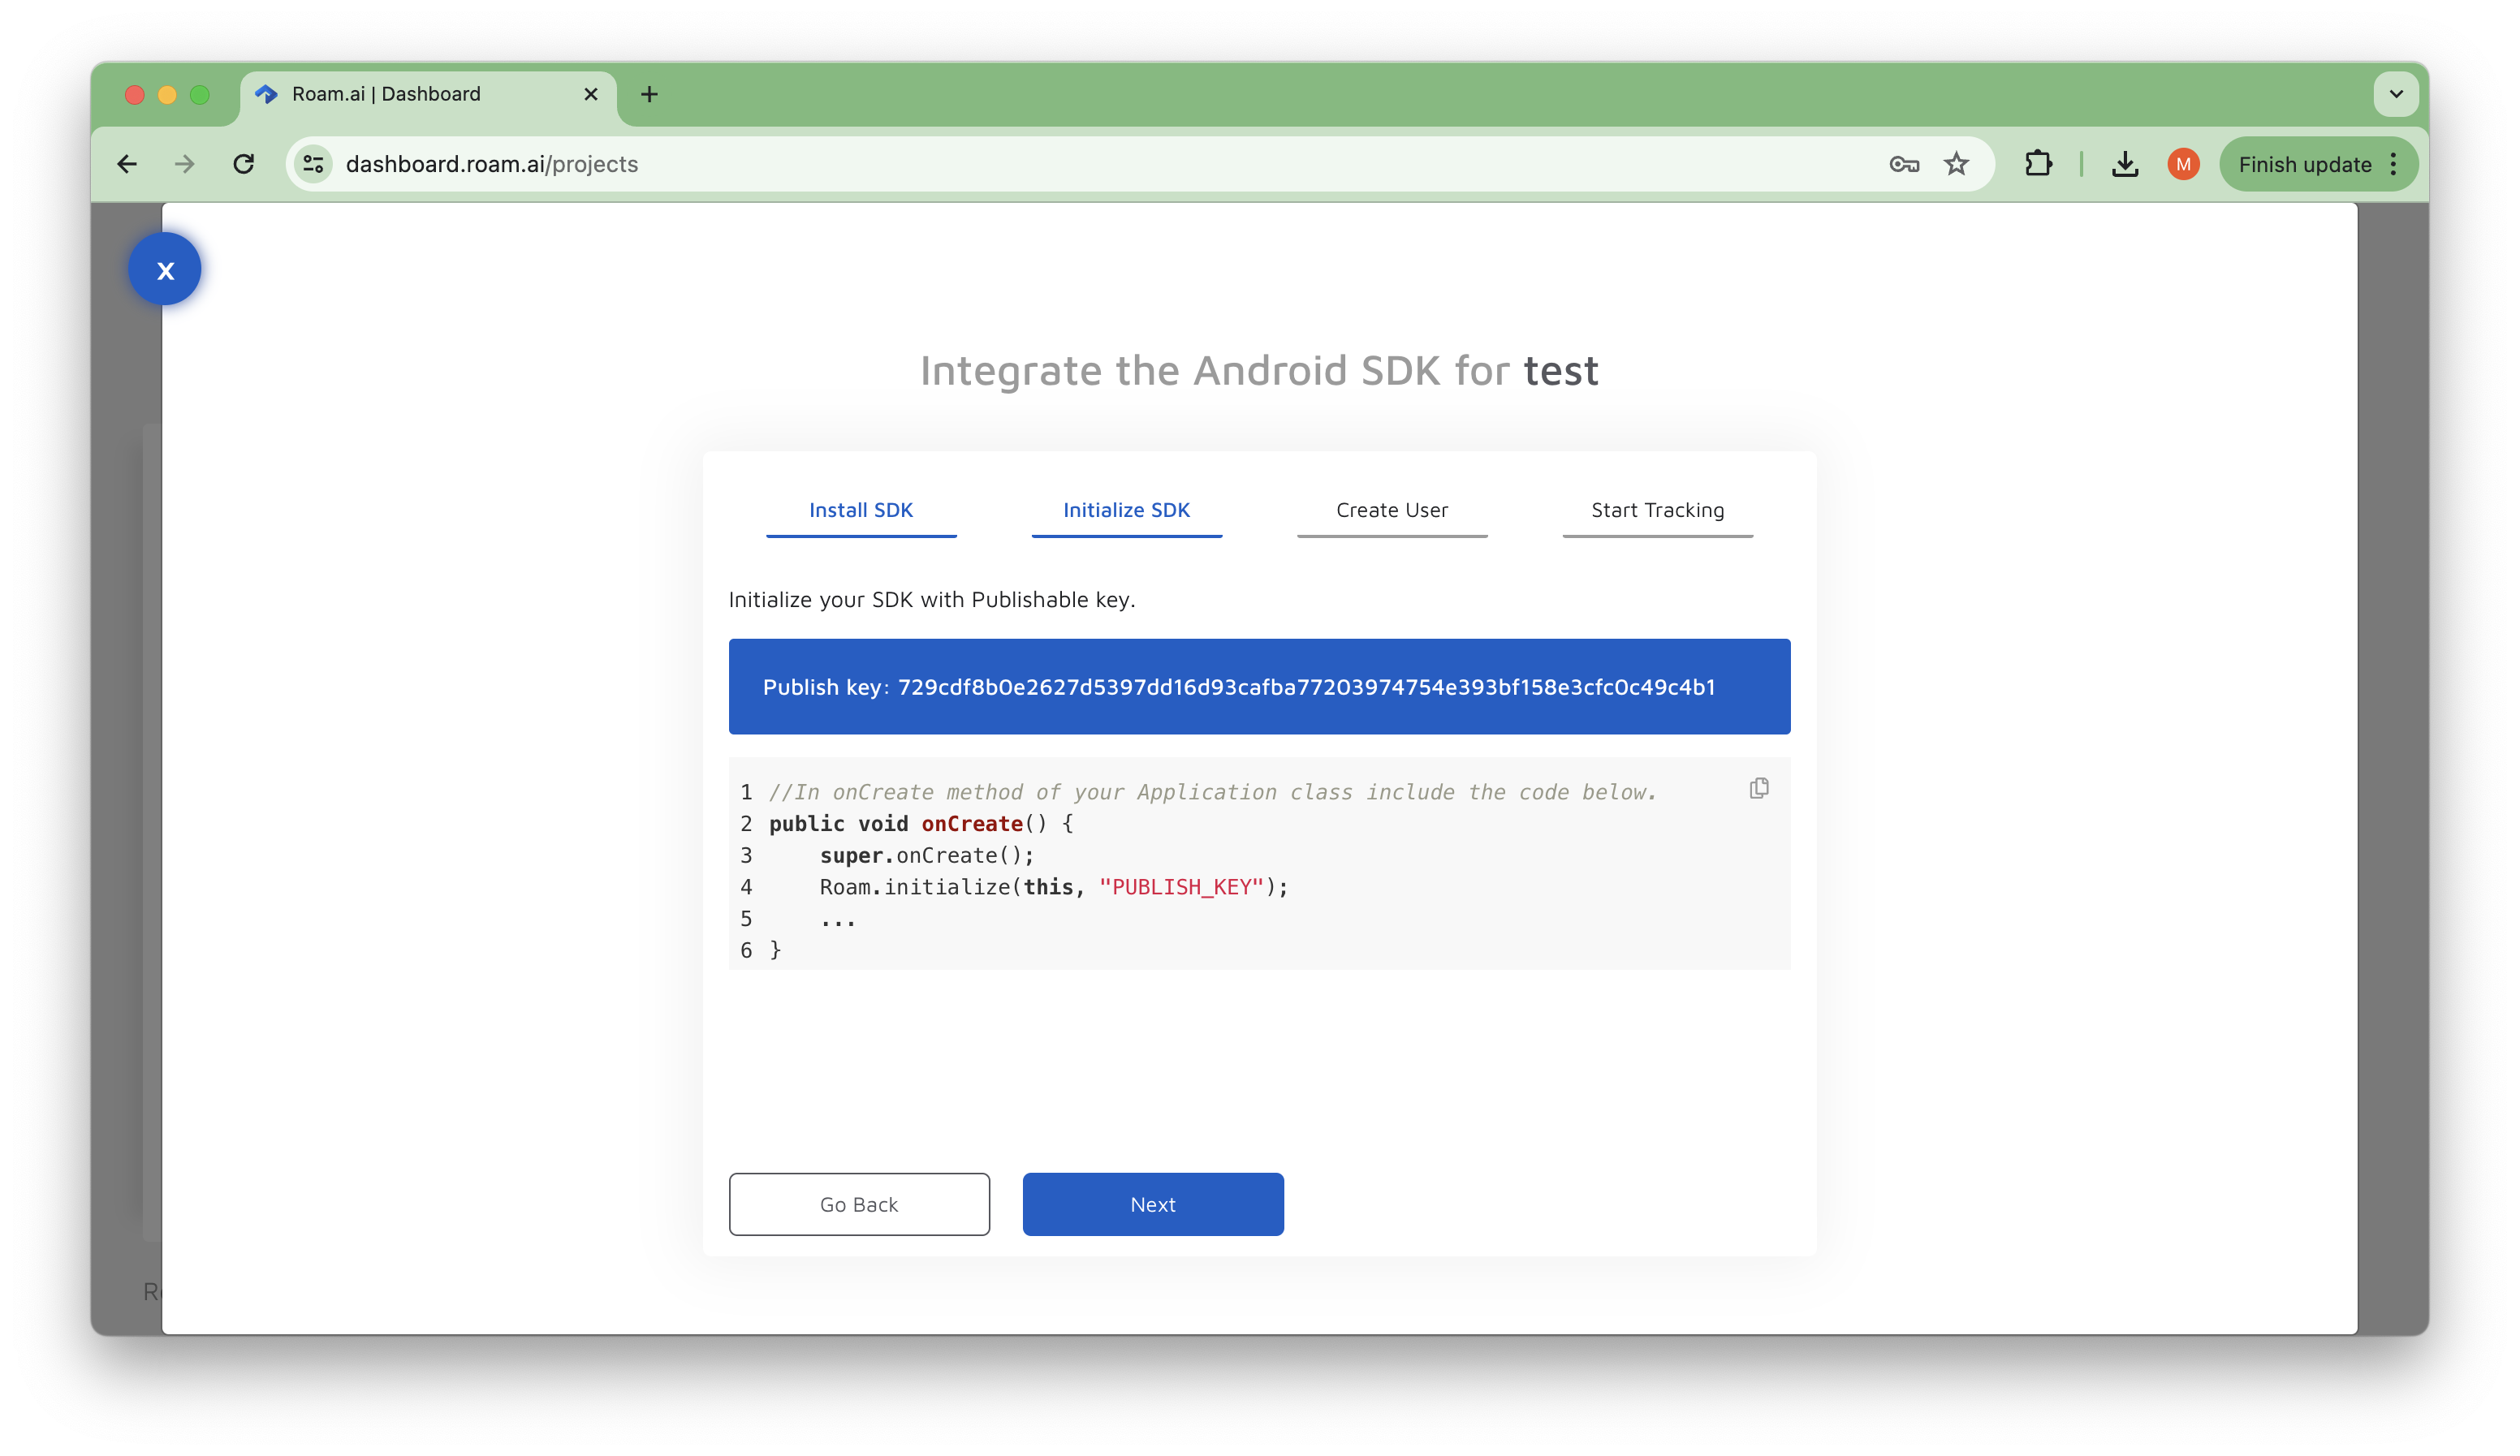
2. To initialize the SDK, you’ll need a publication key which can be found under your project settings.

3. Once you have that key you are ready to integrate the SDK into your Android application.
The Roam Around app
Before you start integrating there’s one "side-quest" you could do. It involves testing out our basic features and location technology with the Roam Around test app. It includes sample applications that demonstrate the use of the v3 Roam SDK for Android.
Why would you want to do this? Have you ever bought a car before test-driving it? If the answer is yes, you’re either Jeremy Clarkson or a used-car salesman. Roam Around is a great way to get familiar with our location technology, dashboard, and functionalities. It lets you see the following features:
- Live tracking location: you’ll be able to track the position of your mobile device in real time. We also allow you to customize the tracking frequency to test out the different tracking modes we have available. Keep the app running in the background whilst you scroll through social media, listen to music, or just have it in your pocket to experience the battery efficiency as you go through your day.
- Sharing your live location: With Roam Around you can share the live location with other Roam Around users to see how the live location-sharing feature operates.
- Historical location updates: The app lets you see the historical location updates on a map to help you visualize the location updates that have been tracked throughout the day.
- Export the historical location updates: The location data you’ve collected through the Roam Around app can also be exported in a CSV file to share with your team for analysis.
If you want the full rundown on Roam Around you can check out this article. For now, we’re going to get back to integrating location tracking.
Setting up with Android Studio
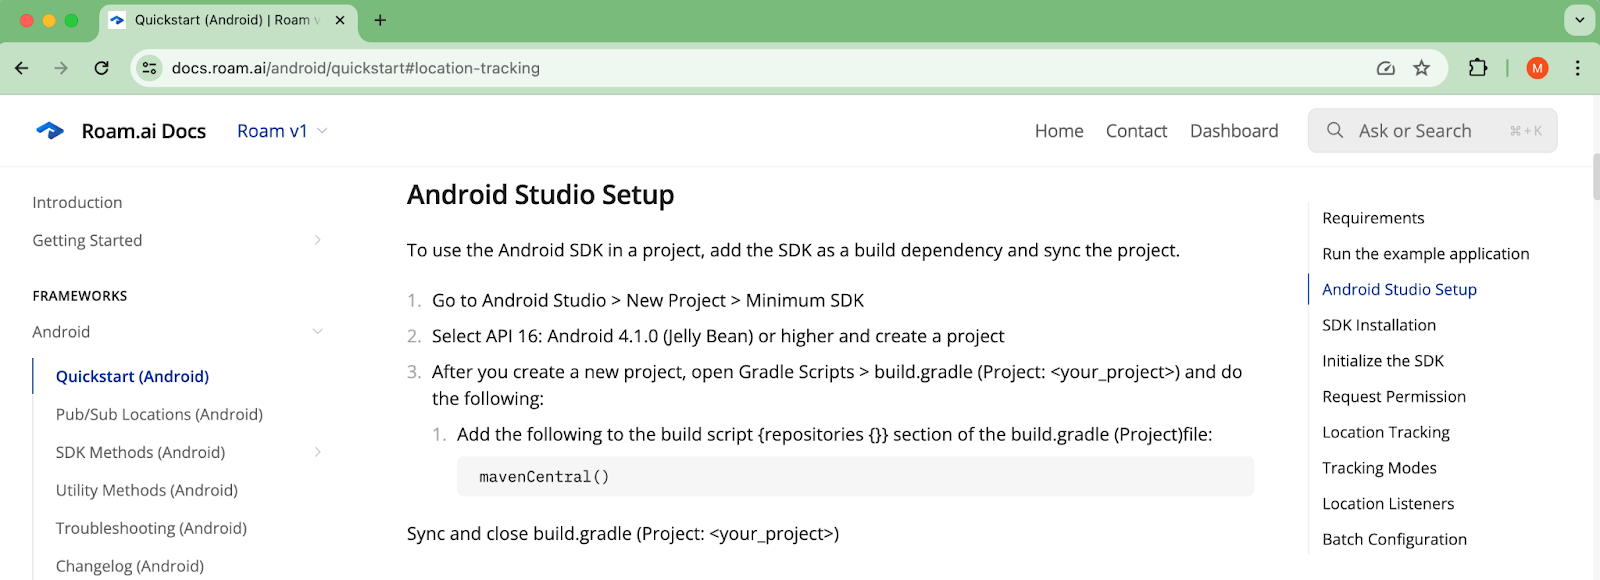
In this next part, we’ll attach a snippet from our docs page because it best outlines how to sync your project with Android Studio. It also gives you an idea of how our docs page looks like and how it helps guide developers for the entire SDK setup for Android and iOS.

Installing Roam’s Android SDK
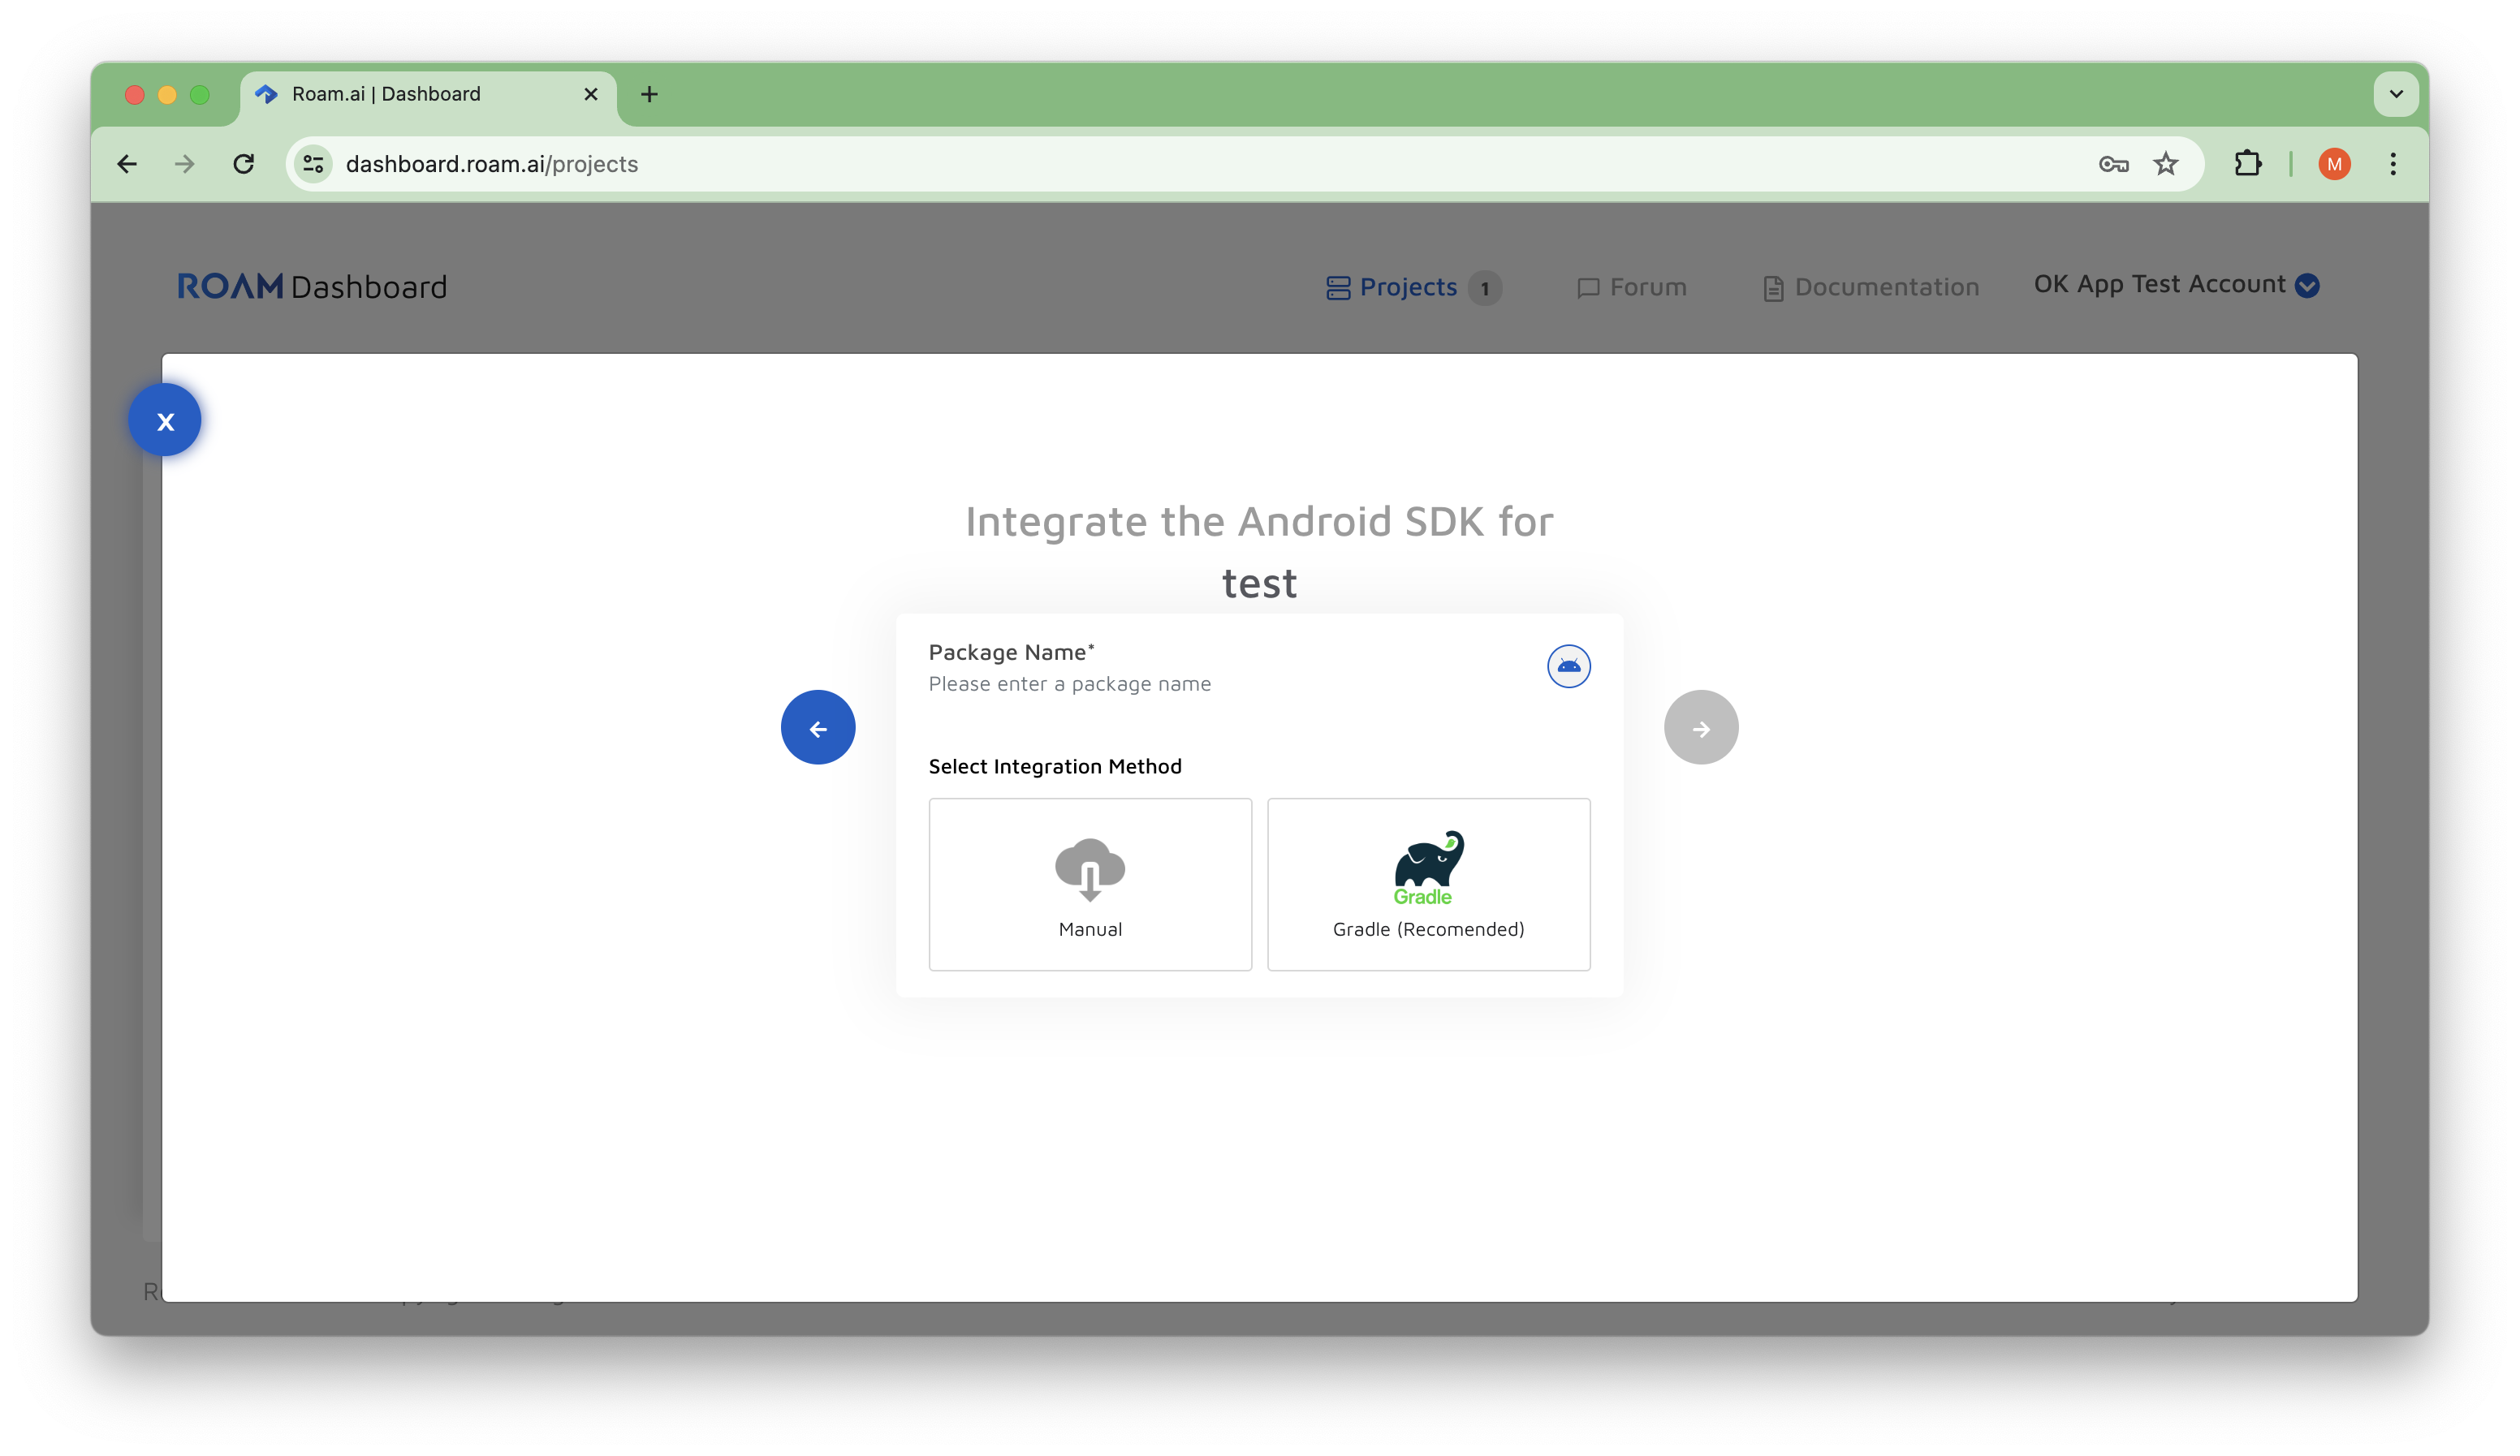
There are two ways of installing the location SDK, either via Gradle in Android Studio or manually installing it.

What is Gradle?
Gradle is a build automation tool for software. It’s used to automate the creation of applications and includes compiling, linking, and packaging the code automatically. It accelerates the software development process of your mobile app so you can publish it faster.
How to install the SDK with Gradle
You’ll need to install the SDK via Gradle in Android Studio and then add a maven to your project build.gradle file. After that, you’ll have to add dependencies too, and then you can sync with Gradle. Again, full details including the code snippets can be found on our docs page.
How to install the SDK manually
If you want to install the location SDK manually you’ll have to download and unzip the Roam SDK. After that, you will need to open Android Studio and add the SDK as a module. Once Gradle is finished you will have to go to “file” and open “Project structure”. Head over to the dependencies tab and under “App” you need to select “Module Dependency”, click on “Roam-release” and wait for Gradle to sync. Lastly, make sure to include the dependencies separately and then sync your project.
Initializing Roam’s Android SDK
Our dashboard offers a flexible initialization approach in the latest update using a manifest file. This allows developers to integrate our service into their apps seamlessly without the need for additional code and saving valuable development time.
Permission requests
To track the location of a device, you will need to request permission to do so because that’s the law (and a pretty important law at that). This applies to all devices below and above Android 10. We’ve included the piece of code for this in our docs pages so you can quickly add it to your project.
Tracking location using Roam.ai's Android SDK
Should you have done all the previous steps you will be able to start location tracking with our SDK. Congratulations!
All you’ll need to do is use the Roam.startTracking method and specify the tracking modes.
Roam.ai tracking modes
We offer three default tracking modes along with a custom tracking mode option which you can use depending on the needs of your app. These modes are defined by the frequency of location updates and the battery consumption.
- Active: The most intense tracking mode we have to offer that can deliver location updates every 25 - 250 meters. Most commonly used by ride-hailing/sharing apps. It will approximately require 6 -12% of the battery to perform, depending on the active period.
- Balanced: This tracking mode delivers location updates every 50 - 500 meters and requires 3-6% of battery to perform. Optimal for demand services like delivery apps.
- Passive: Our passive tracking mode uses 0-1% of the battery to pick up locations every 100 - 1000 meters. Ideal for social apps that use location features to allow users to share their location for brief periods.
You can also define the method of location updates either through distance or time intervals. You can customize the distance and time interval of your choice in meters and seconds respectively.
And that should just about cover everything to do with integrating location tracking using the Roam Android SDK. As mentioned before, should you want the full developer details head over to our docs page. It gives you snippets, example codes, and walks you through the steps from location tracking to utility methods, and troubleshooting.
Want to know what we do at Roam
If you’re looking to build location-aware mobile apps and utilize location technology, contact our team or sign up to our dashboard and discover how to build your app with Roam.ai’s Location SDK and APIs today.
